What's new

FREE Audio, Mixing, Effect Plugins Thread

My answer to your first question assumes that you're doing your own mastering, that is, delivering a completely finished piece of music that's not going to get any further processing.

My favorite free all-in-one master bus plug-in is bx_masterdesk Classic, which you get as part of a bundle of other useful free plug-ins when you register with Plugin Alliance. It has the processors you need, all in one plug-in. Compressor, EQ, limiter, and spatial manager. And some useful presets. Add to that MAnalyzer and MLoudnessAnalyzer from the Meldaproduction FreeFX Bundle and you're good to go.

For you second question, I believe what you're asking is whether after I first get the best mix I can get with no master bus FX I either export that mix as a stereo file and apply FX to the stereo file, or do I just declare the mix "finished" (hah, as if....) and start putting processors on my master bus?

For me, this first of course depends on whether I'm mastering the piece using the same program I used to mix it. At this point, I'm not using a separate program, so I just keep it and start applying master bus FX.

I also image that you want to know the pros and cons I believe are inherent to doing it either way. The practice of rendering it to a file before applying master FX is the traditional one, and goes way back to phonograph records, where it was the job of the mastering engineer to apply limiting and compression to make the music as loud as possible without making the needle jump the groove, and to also apply the RIAA EQ curve, an inverse of which is built into phono preamps. As time went on the role of the mastering engineer became more important, and they started adding EQ cuts and boosts in cases where the music as delivered needed them, as well as other things like spatial width manipulation and even reverb. And if they couldn't solve any mix issues in the mastering process, they'd kick the tape back to the producer and they'd have to do the EXPENSIVE process of trying another mix.

Now, after a couple of decades of pro quality processing being within easier reach of everyone, the philosophies around mastering are changing. Even 5 years ago, the mantra was "never master your own project." The biggest reason for this, assuming that the people involved did have the skills to do it, is that the musicians and mix engineer are "too close" to the finished mix and aren't able to hear it objectively. I guess the magazines and schools and whoever "decides" what "best practices" are noticed that so many of us were ignoring this that they've eased up. Now the idea is to do it that way if you can afford it and your music demands it (you're trying to have a top 40 hit or maybe you just aren't good at applying master bus FX).

This is the workflow that's being imitated. Obviously, if someone else is mastering your piece, you need to do it that way, similar if you're using a program other than Logic to master.

The other reason to do it that way is that there is a school of thought (based on decades of experience) that says that even if you're going to do it yourself, you should completely separate the processes of mixing and mastering intellectually so that you don't do things like chasing your tail going back and forth and adjusting the mix while you're adjusting your master bus processing. Mixing to 2 tracks helps enforce this. Along with this, it helps get out of the pit of endlessly polishing a piece and never finishing it to the point of release or submission.

How do I do it? I can't afford to have someone else do it, so it's a-gonna be me doing the master bus FX. I use the same software to record, mix and master, so it's all happening in Cakewalk. Given that, I agree that there's no real benefit to me to making a separate export. So far, I've confined my endless polishing and procrastination to the composing and mixing phases, and as long as my projects remain trapped there, I don't have to face the question anyway. :emoji_confounded:

Seriously, by the time I get a mix to the point where I think it's "ready," I just start applying master bus processing and keep away from the faders. In the rare event that a sound element is poking out or getting lost, I will allow myself to nudge its fader by no more than 2dB at a time. That keeps me away from the tail chasing.

Having said all of that, there's an even newer school of thought that suggests that mixing with mastering processors on the bus can be okay to do. The idea there is that you call up your favorite Ozone or The One or bx_masterdesk preset, or maybe just a limiter, slap it on the master bus and mix away so you don't have to be concerned whether it's all going to sound too different after going through the limiter (and bus compressor and EQ). When the mix is finished, it's finished and you don't launch another phase of the process.

I see some merit in this notion. However, I do think that taking a day or several days between finishing mixing and moving on to mastering helps give perspective. What I do in practice is work on my mix with the master FX on the master bus but bypassed. Then every so often I'll switch them on for a listen just to check.

YMMV....
Wow this is a supercomplete answer... thanks. I did by the way encounter side-effects when combining mixing/editing and mastering in one project and that is with Ozone Elements on the stereo-out. It caused (in LogicX) rather a lot of delay on recording tracks, even when set to off. This is undesirable when you still make changes to the project. If you are completely done with editing and mixing, it is no problem of course. It took me a while to discover what caused the delay: Ozone Elements.
 
Wow this is a supercomplete answer... thanks. I did by the way encounter side-effects when combining mixing/editing and mastering in one project and that is with Ozone Elements on the stereo-out. It caused (in LogicX) rather a lot of delay on recording tracks, even when set to off. This is undesirable when you still make changes to the project. If you are completely done with editing and mixing, it is no problem of course. It took me a while to discover what caused the delay: Ozone Elements.
The latency is not a side effect, it's is part of how brick wall limiters work. The maximizer adds significant latency, many lookahead brick wall limiters do. This is because it needs to set a lookahead buffer in order analyze incoming audio ahead of time so that the processing is as transparent as possible....
 
Wow this is a supercomplete answer... thanks. I did by the way encounter side-effects when combining mixing/editing and mastering in one project and that is with Ozone Elements on the stereo-out. It caused (in LogicX) rather a lot of delay on recording tracks, even when set to off. This is undesirable when you still make changes to the project. If you are completely done with editing and mixing, it is no problem of course. It took me a while to discover what caused the delay: Ozone Elements.
You can use a low-latency limiter in place of ozone while you record. E.g. loudmax or w1, both great free plugins.
 
You can use a low-latency limiter in place of ozone while you record. E.g. loudmax or w1, both great free plugins.
I actually do the same thing. Since @Harry Koopman is in Logic, Logic's Brcikwall Limiter is a good choice. It has no latency at all if you turn lookahead down to 0. I've done AB comparisons of it set like this with L2, T-Racks Brickwall Limiter, etc.. It sounds essentially identical to L2 & some of the T-Racks Brickwall algorithms. I wouldn't export a mix though the Logic limiter because it's not as punchy as Ozone, Pro-L2, etc, but I do mix into to it and occasionally check how my mix will stand up to limiting....

I also put a zero latency clipper before it to shave off a dB or two so the limiter doesn't have to do so much work. I use StandardClip (a bargain at $25) set to no oversampling and hard clip. Disabling oversampling means no latency... You can also use Logic's bit-crusher as a clipper, as well as PhatFX. Basically you can get a rough idea of how smashed a track will sound after mastering without adding latency. When it's time to export you just bypass the low latency plugins, then add Ozone, Pro-L2, etc.

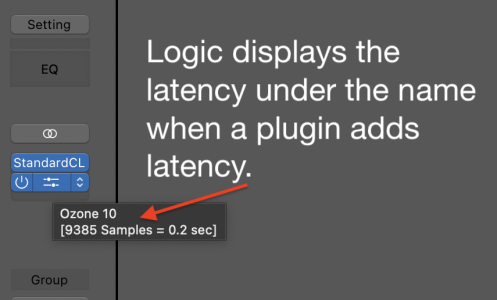
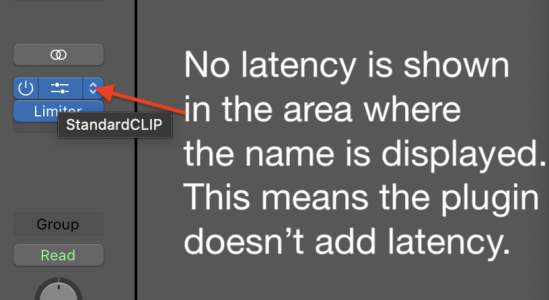
As far as determining the latency a plugin adds you simply hover over the plugin's name in the insert slot. After about half a second Logic will show you the latency the plugin adds underneath the plugin name. If a plugin doesn't add latency Logic will just display the name of the plugin. See the pics.


Logic Added Latency Popup.png


Logic No Latency Popup.png
 
I'm actually a bit surprised that Logic is still affected by Ozone's latency with the plug-in bypassed. It's not that way with Cakewalk or Mixcraft. Bypassed means that there's a virtual straight wire where the plug-in was. (That is at least if you bypass it using the host's bypass button. Sometimes individual plug-ins have their own bypass switches that still leave them doing a certain amount of processing or reporting latency.)

Guitar stompbox aficionados would probably call this "true" bypass. :emoji_grinning:
yeah they probably do it so that you can automate the on/off without things getting out of sync, but I'd love to see an actual full bypass as well...
 
Option-clicking when you unload the plugin will remove its latency. I believe they did it this way for click-free plugin bypass
 
Kilohearts were mentioned a couple of years ago; they've been busy with their free Essentials. 32 mixing and creative FX including reverb, delay, tape stop, reverser, ring modulator, transient shaper, and my favorite pitch shifter. And they add to the collection every so often.

The UI's are minimal, which fits the "essentials" designation, and that's often a good thing. For instance, I put their limiter on channels when I'm auditioning synth patches to make sure that excessively loud sounds don't come blasting out of my monitors. Limiters with more features are overkill for that application.

They can operate either as snap-ins in the Kilohearts ecosystem (Snap Heap, Phase Plant, etc.) or as standalone VST3's.
 
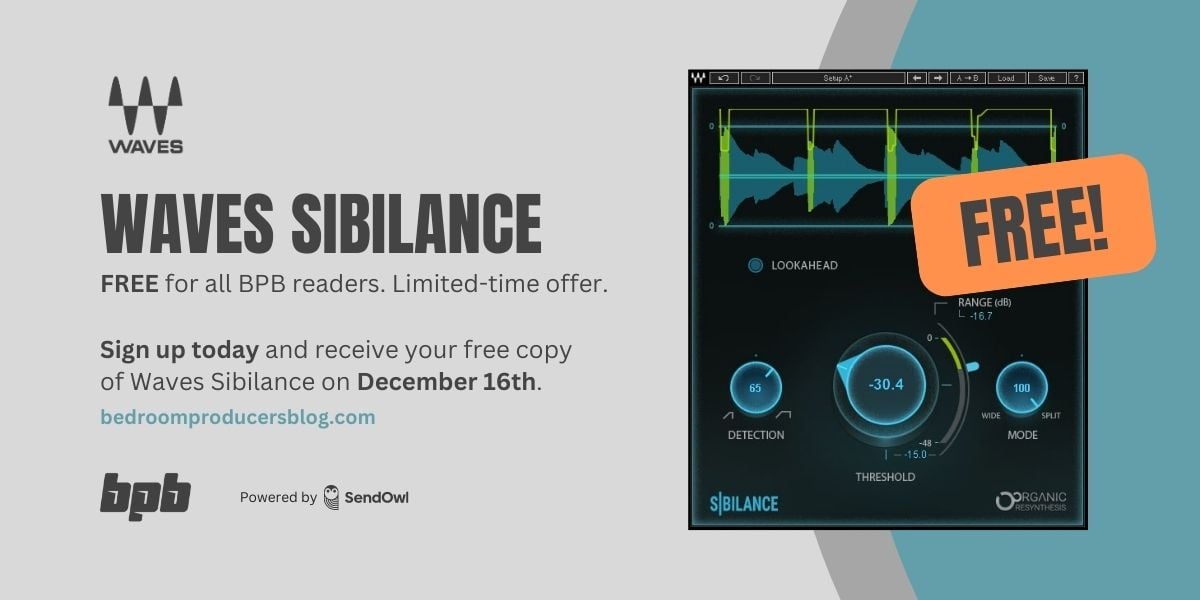
Waves Sibilance v14 free at bedroomproducers blog (till Dec 16). Just requires your email..(uncheck the box to receive marketing). I have it (v11), but this is how I avoid WUP, as there are free Waves plugins given away from various places through the year.

 
Waves Sibilance v14 free at bedroomproducers blog (till Dec 16). Just requires your email..(uncheck the box to receive marketing). I have it (v11), but this is how I avoid WUP, as there are free Waves plugins given away from various places through the year.

Great! I'll be doing the same as you!
 
Has nothing to do with orchestra, but one of my best finds for freebies is Pecheneg FX Tremolo. As far as trems go its a Cadillac imo. Has the controls needed to precisely dial in most trem sounds from vintage slow slewing asymetric ramps with non-silent floors to modern fast slew helicopter trem. Here is an example of the former: Pecheneg trem example. The one thing missing is bias control over the trem waveform which is useful for recreating Fender style trems. So a different product needed for that, but those products usually don't do all the other things this one does so well.

As for the dynamic EQs being discussed, I have Tokyo Dawn's NOVA (both free and paid versions), MDynamicEQ, and PA's Kirchoff EQ. The Kirchoff gets all the use at this point...it just does so much stuff well and is so easy to use and sounds so good. But for "get it free any time you want", NOVA is fantastic imo.
 
I should post this here!

We have a free plug-in at JDFactory called UltimUtility.


It's like your favourite utility plugin with probably more features since this one is ultimate. :2thumbs:

Also the gain slider is smoothed so you can make clickless automations even if you write stairs.


Cheers!
 
The free overdrive / distortion type plugin MORE by Modsound sounds very pleasant to my ears - especially for milder breakup. It also has a mix knob, so one can blend clean and distorted signals to taste for maintaining a crisp attack while also adding compression inducing breakup.

When using it on electric guitar, I generally add a speaker simulation or a full clean amp in the signal chain.

MORE is a collection of wave digital filter-modeled distortion circuits, taken from the world of guitar, but modified for general use. Various tube amplifier gain stages are included, as well as a transistor fuzz pedal and a diode distortion circuit.

 
'Pumpkin' saturation tool from Acustica Audio is free until November 5:
Great! You have to subscribe, set up an account and use their installer; but they do have some other nice freebies you can download at the same time.

I'm unsure about their new approach to saturation. It should be more CPU efficient, includes oversampling options, and it has an interesting display that I don't quite understand. It might be great, it might not; but it does seem to sound distinctive and good at at least low levels.

Thanks.
 
I regularly use the following free plugins.

Valhalla Supermassive by Valhalla DSP
Delay/Reverb

Saturation Knob by Softube
Saturation/Distortion

TDR Nova by Tokyo Dawn Labs
Parallel Dynamic EQ

Supercharger by Native Instruments
Tube Compressor

MJUC by Klanghelm
Vari-mu compressor

Limiter No.6 by Vladislav Goncharov
Mastering Limiter

Ozone Imager 2 by iZotope
Stereo Imager

SPAN by Voxengo
Spectrum Analyser

Companies that offer the best free plugins.

Toyko Dawn Labs
Klanghelm
Melda Productions
Kilohearts

Companies that offer the best free instruments.

Native Instruments
Spitfire Audio
Pianobook
Orchestral Tools
 
Last edited:
Top Bottom